Best practices for creating a Seminar
A step-by-step guide with best practices and advice for creating high-quality, case-based teaching sessions.
🔹 Step 1. Pre-Upload: Prepare Your Case Data
Before uploading a case:
-
Preview and remove unnecessary series or images
-
Aim to upload only essential images or series, keeping the study as small as possible
Fewer images help:
-
Maintain audience focus
- Improves upload and access speeds
⚠️ You won’t be able to delete a series or image from your case after starting the upload.
⚠️ Preview and deselect all unwanted series or images before uploading the case data or creating a draft.
🔹 Step 2. Draft Case
When creating your Draft case:
-
Set a preferred hanging protocol with the key images displayed
-
Include:
-
Title (e.g., pathology or clinical condition)
-
Clinical details
-
Suggested diagnosis / Imaging findings + confidence level
-
Suggested Follow-up (optional)
-
💡 Tip: Adding complete details early will streamline seminar setup.
- Publish the case to the event group or your group.
- 🔧 Optional: After publication, use the Add Study to Case, Edit Case, or Revert to Draft options to include more content or make further adjustments to your case.
🔹 Step 3. Create a Collection - Case Playlist
-
Create a new Collection and add each published case to the collection via case options.
-
Your collection can include your cases posted in other groups as long as:
-
You are the publisher of the case and have created the collection

-
-
Use drag and drop to order your cases in the collection
-
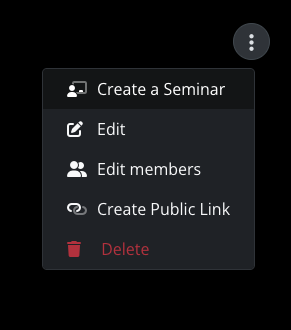
When ready, click Create a Seminar from the collection options at the top.
🔹 Step 4. Curate Your New Seminar
Use the ✏️ pencil tool to edit:
- Modify the Seminar name, Case titles, Diagnosis, and Clinical Detail fields (optional)
-
Hide or unhide cases not needed, and the Diagnosis and Clinical Details fields.
-
For each case, you can add multiple-choice questions and Polls using the Questions button.

-
Adding Slides to a Seminar
-
Prepare your slides in PowerPoint, Google Slides, or another application.
-
Export them as JPEG, PNG, or PDF.
-
Upload the exported slides to the seminar.
-
Use this for title pages, learning objectives, or case summaries after the DICOM images.
-
💡 Tip: Invest in high-quality slides—they can be reused in future seminars, saving time and effort.
-
🔹 Step 5. Final Review and Share
-
Review the seminar from start to finish before presenting it.
-
Check that cases, slides, and text fields not meant for the audience to see at launch are hidden.
-
Click Share, and set access start/end dates, + Add a password.

-
Tip: Use a URL shortener or hyperlink to tidy the long link (optional)
- Present the seminar to reveal answers and control hidden fields.
♻️ Step 6. Reuse and Maintain
-
All of your seminars appear in the My Seminars (Beta) menu
You can duplicate, edit, and reshare seminars for future sessions.
Create Multiple Seminars from the original Collection
Create as many seminar variations as you wish via the original collection or using the duplicate button.
📝 Additional Tips
- Editing Cases Within Seminars
Changes made inside a seminar will not affect the original published case — ideal for adapting the same case to different audiences. - The default viewer layout of the original case will be applied and cannot be modified for a seminar case.
To restrict audience access to your shared seminar at any time:
Share the seminar again - changing the password, and/or defining new access dates.
💡 Tip: To practice or preview the audience view, open the shared link in an incognito/private tab (Companion Mode).